Mr.B & EJ recently butchered 8 chickens. I immediately placed two in the stock pot providing me with 8 cups of deboned, shredded chicken and 9 3/4 quarts of homemade chicken stock. Too many times I have witnessed the cook pouring the leftover stock down the drain because they didn't have room in their freezer to store it and didn't know how to can it, OR the worst, didn't think to keep and use it at all.
Home canning is not complicated. It only requires the proper equipment and a little bit of time. The basic equipment needed for home canning includes: canning jars (various brand names include Mason, Kerr, Atlas, Ball), lids & bands for the jars, a water bath canner and/or a pressure canner (dependent upon what you choose to can), a jar funnel, and jar lifting tongs. I also suggest obtaining a copy of the Ball Blue Book of Preserving. Since chicken stock is a low acid food, a pressure canner is required.
Step 1: As mentioned in other food preservation posts, choose a quick and easy supper, like Pioneer Woman's open faced Green Chili Enchiladas - 15 minutes from start to eat. Click HERE for the recipe. Note - the tomatoes and avocado chunks are my own addition because, well, I am just that way.
Step 2: Grab the broom and dust pan so you can clean up the broken canning jar you will most certainly drop onto the basement floor, like I did.
Step 3: Because the canning jar shattered into tiny shards, you will also have to vacuum the throw rug.
Step 4: Sterilize your canning jars. I choose to use my dishwasher but you can also place them in the sink and cover them with boiling water.
Step 6: Measure and fill your pressure canner with water according to your manufacturer's directions. Mine requires 3 quarts. Adding a small amount of white vinegar will help prevent mineral deposits on the outside of your jars. Turn the heat on medium so the water in the canner begins to heat up.
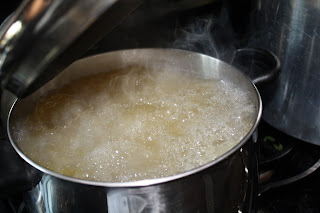
Step 7: In a large stock pot, bring your chicken stock to a full rolling boil.
Step 8: While your stock is coming up to a boil, fill your sink with HOT water and add your canning jars, bands and lids. I use my tea kettle to get it really hot. See the steam?
Step 9: Once the stock is boiling, fill your hot jars with hot stock to within 1/2 inch of the top. Your jar tongs will assist you in removing the jars from the hot water.
Step 10: Wipe the edge of your canning jar to remove any excess drips.
Step 11: Place the lid on the cleaned jar. Always use NEW lids. Never try to reuse them.
Step 12: Screw the band on. The band only needs to be hand tight.
Step 13: Use the jar tongs to lift the jar into the canner - it's hot.
Step 14: Repeat steps 9 thru 13 until your canner is full. My canner will hold 7 quarts.
Step 15: Turn the heat up to high. Once the steam valve has popped up, add the weight and bring the pressure up to 10 lbs. For chicken stock you will have to maintain 10 lbs. pressure for 25 minutes. If the pressure gage moves over 11 or 12 lbs., reduce the heat - being careful not to allow the pressure to drop below 10 lbs.
Step 16: Once your timer rings, you will turn the heat off and allow the canner to sit on the stove until the pressure gage reads 0 lbs. For safety reasons, do not attempt to open the canner until the pressure levels have reached 0.
Step 17: Using your jar tongs (jars are still hot) move the jars to a clean towel and allow them to cool. As they cool you many hear a few "pings". This is normal and indicates your jars making a tight seal. Once the jars are cool, use your thumb to rub the center of the lid. If the lid "pops", you will have to re-can the broth. If there is no movement or sound your jars have sealed properly.
Lastly please do not let the below disclaimer scare you away from home canned foods. I and all my extended family have been eating home canned foods for generations and no one has ever become ill. However, I believe it is important everyone is aware of the following safety precautions:
To prevent unwanted bacteria and food spoilage, always make sure your equipment and canning area is very clean. If your home canned foods ever loose the seal, contain any mold or other signs of spoilage, do not consume it. Securely discard the spoiled food and the jar, lid and band - do not feed it to animals. Do not reuse the jar, lid or band.
If, by chance, you or anyone else, exhibit food poisoning symptoms after consuming home canned foods, go to the nearest emergency room immediately. Tell the medical staff you have been eating home canned foods and need to be tested for botulism. It is imperative you request a botulism test because if left untreated botulism is fatal.


I love making my own stock & canning it. This is one of my favorite things to do after Thanksgiving....make turkey stock. While everyone else is out Black Friday shopping, I stay home and do canning of my stock.
ReplyDelete